Tasha is another expert in baby crafts! She has tons of cool ideas, and I am so excited about the tutorial she is sharing today...

1


1. Baby Girl Hair bows 2. Baby bib girls 3. Baby bib boys 4. Burp rags (my favorite kind) 5. Decorated baby hats 6. Simple flannel baby blankets 7. A baby quilt and Monster doll
*********************************
I am excited to be here visiting Oopsey Daisy today and participating in Baby Week. I am Tasha (said with an "a" sound) over at Creation Corner who loves a good project. I started my blog as a place to put my crafts, but eventually started adding all the projects I want to do also. I hope you will come by and check it out. I would love to meet you.When Alison asked me to join in on Baby Week I was thrilled. I love to do handmade gifts. Baby presents are no exception. Today, I will be sharing a tutorial on how to make cute and simple baby bibs.
Baby Bib Tutorial
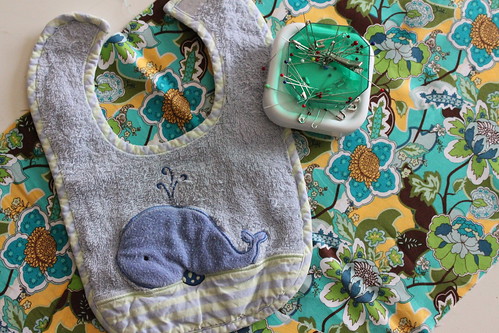
Gather your materials:
Front and back fabric
An old favorite bib
Pins
Thread
Sewing machine
Sew on Velcro
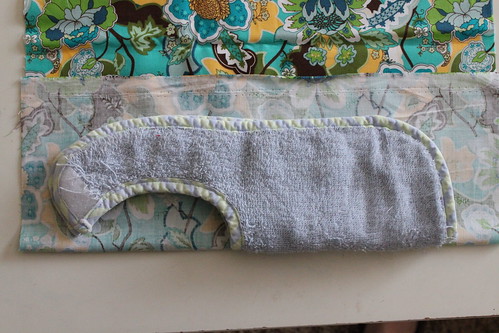
1. Take the bib and fold it in half. Take your front fabric and fold it down enough for the folded bib to fit on. Make sure the edge of the folded bib is on the edge of the folded fabric.
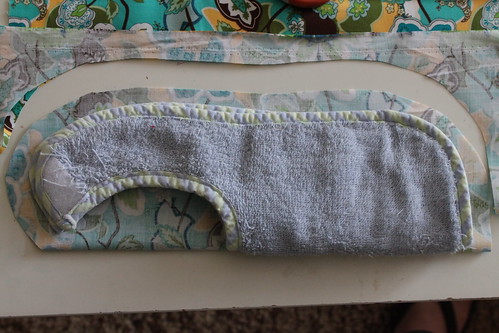
2. Cut out the fabric about a 1/2 inch larger then the bib. Make sure to cut out around the neck too. I hadn't done that when I took the picture. But, you need to do it around the whole bib.
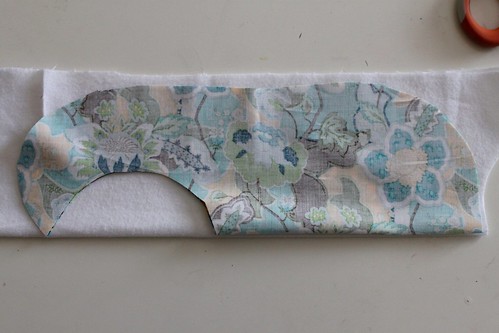
3. Then take the bib you have just cut out and use as your pattern for the backing fabric. This one you will cut out the exact same size as the bib you are using. I like to use flannel most of the time. It is absorbent and that is nice with a baby.

4. Here is what your two pieces should look like.
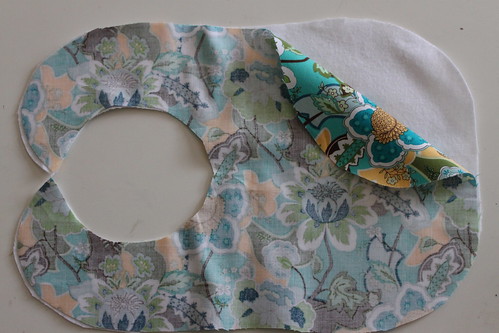
5. Now lay the two pieces on top of each other with right sides together.

6. Pin them together.
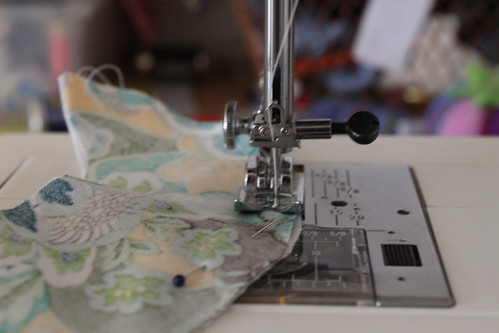
7. Sew around the whole bib leaving a 2 inch opening at the bottom.
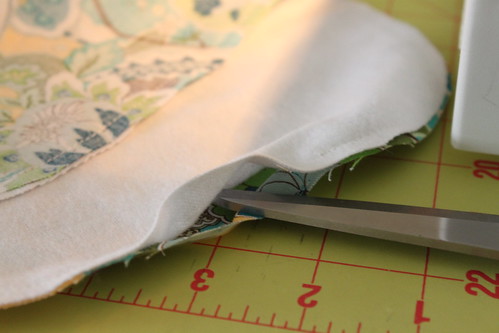
8. Here is my opening at the bottom of the bib. It needs to be big enough you can turn your bib right side out.
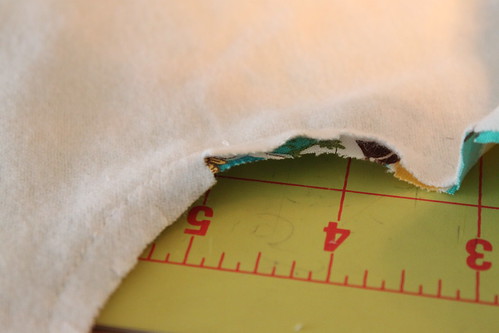
9. Take your scissors and make small clippings anywhere your sewing is curved. This helps to not have your bib pucker when you turn it right side out.
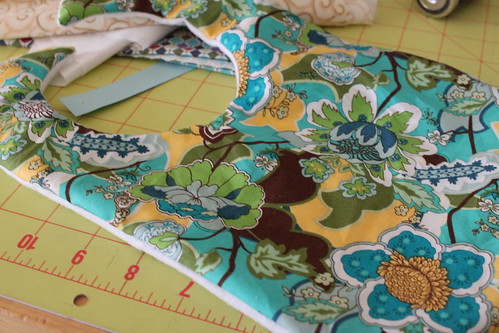
10. Turn it right side out. I often use a chop stick to push my corners and edges out nice and smooth.
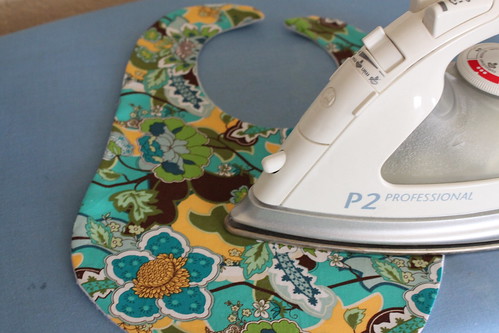
11. Iron it flat. Make sure to turn in the area you left open at the bottom to match the rest of the bib.

12. Stitch on the outside now. You want the stitching close enough to stitch down your hole at the bottom, but not right on the edge.
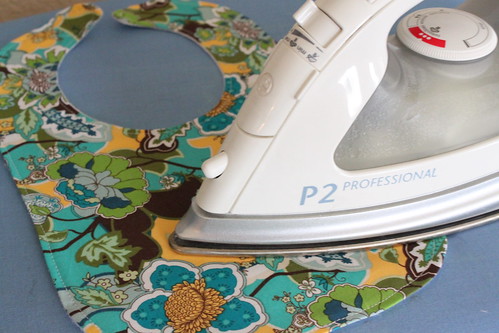
13. Iron it flat again.
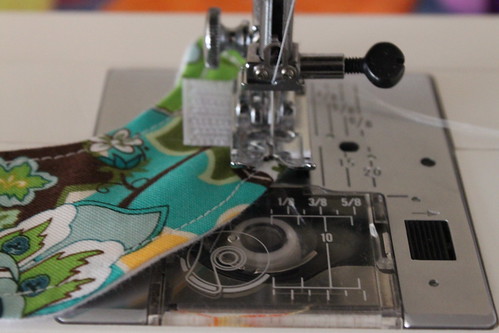
14. Cut small pieces of sew on Velcro. Sew on one piece to each side of the bib up at the top. If you have snaps you can also use those.

(the back side with the Velcro)
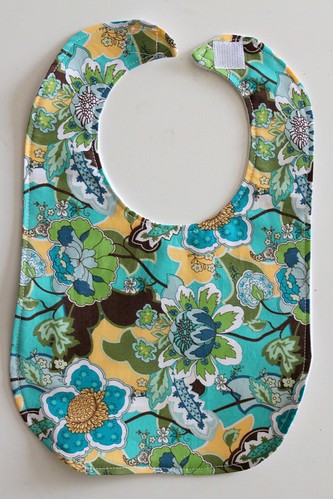
There you have it. A fun cute baby bib. I also like to add on fun flowers or iron on something cute too sometimes. There are many options with these bibs.

Here are just a few other baby ideas I have done in the past:
Baby Bib Tutorial

Gather your materials:
Front and back fabric
An old favorite bib
Pins
Thread
Sewing machine
Sew on Velcro

1. Take the bib and fold it in half. Take your front fabric and fold it down enough for the folded bib to fit on. Make sure the edge of the folded bib is on the edge of the folded fabric.

2. Cut out the fabric about a 1/2 inch larger then the bib. Make sure to cut out around the neck too. I hadn't done that when I took the picture. But, you need to do it around the whole bib.

3. Then take the bib you have just cut out and use as your pattern for the backing fabric. This one you will cut out the exact same size as the bib you are using. I like to use flannel most of the time. It is absorbent and that is nice with a baby.

4. Here is what your two pieces should look like.

5. Now lay the two pieces on top of each other with right sides together.

6. Pin them together.

7. Sew around the whole bib leaving a 2 inch opening at the bottom.

8. Here is my opening at the bottom of the bib. It needs to be big enough you can turn your bib right side out.

9. Take your scissors and make small clippings anywhere your sewing is curved. This helps to not have your bib pucker when you turn it right side out.

10. Turn it right side out. I often use a chop stick to push my corners and edges out nice and smooth.

11. Iron it flat. Make sure to turn in the area you left open at the bottom to match the rest of the bib.

12. Stitch on the outside now. You want the stitching close enough to stitch down your hole at the bottom, but not right on the edge.

13. Iron it flat again.

14. Cut small pieces of sew on Velcro. Sew on one piece to each side of the bib up at the top. If you have snaps you can also use those.

(the back side with the Velcro)

There you have it. A fun cute baby bib. I also like to add on fun flowers or iron on something cute too sometimes. There are many options with these bibs.

Here are just a few other baby ideas I have done in the past:

1


1. Baby Girl Hair bows 2. Baby bib girls 3. Baby bib boys 4. Burp rags (my favorite kind) 5. Decorated baby hats 6. Simple flannel baby blankets 7. A baby quilt and Monster doll
Thanks again for letting me be part of Baby Week. I hope to meet some of you over at my blog, Creation Corner. I also have an etsy shop called My Creation Corner where I sell different things I have created. Have fun making baby gifts. Don't be afraid if you haven't done a lot of sewing. It is all trial and error. It is okay to make mistakes. Happy sewing and crafting!
I love Tasha's attitude about trial and error... that's the Oopsey Daisy way! Don't you just love that step-by-step tutorial?! I'm ready to make me some bibs!!

Love the tut and will be making some of these ASAP for my friend due this summer!
ReplyDeleteThe chopstick idea is genius!! Fabulous job, Tasha!
ReplyDeleteVery chic bib!! Great tutorial. I'm loving all of your fabric choices!
ReplyDeleteThis bib is adorable!
ReplyDeleteVery cool! Where do you get your velcro? Best place I have found is:
ReplyDeletehttp://www.itapestore.com/sew-onvelcrohookandlooptape.aspx
My wife is getting into this as we are going to be "trying" soon and she wants as much homemade as possible.
I absolutely love this baby bib, I will make one for my niece. Thanks so much for the great instructions, so easy to follow.
ReplyDeleteI have my first on the way and have already bought some more practical Bibetta Bibs. But I came across this and thought I might try my hand at this a little later in the pregnancy. Thanks for sharing this guide.
ReplyDelete