Alright, it's Black Friday, and now I can officially welcome in the Christmas season! I try to save my Christmas celebrations for the day after Thanksgiving. So now that my favorite time of year is here... bring it on!
Anticipating a special occasion is half the fun--am I right?! I think I own at least 3 Christmas advent calendars--so you will see more ideas! But today I want to share the tutorial for making my latest and greatest countdown.
Come along with me and see how I made this sweet lil' Christmas tree countdown!
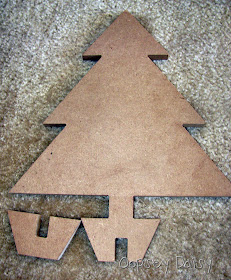
I had the opportunity to decorate this Christmas tree from Say It With Letters. There is something about unfinished wood that is so exciting to me--all those possibilities! I was so excited when this package arrived in the mail!
As soon as I saw this tree, I knew I needed to go shopping at my local scrapbook store. I cut strips of the new My Mind's Eye Christmas paper and used my Fiskars scallop punch on some of the strips. I overlapped the paper strips and mod-podged all of the paper onto the tree. I covered both sides of the tree and even the edges. Then, I trimmed it all up. I even sanded the edges so there were no sharp paper edges.
I decided that this tree needed some BLING. I gave the tree a thick coat of mod podge and started dumping on the glitter! Next, I added red sparkly ribbon and green sparkly ribbon stripes. This little tree definitely shines!
I decided that it would be fun to use this tree to count down the days until Christmas. So I found some glittery snowflakes at Hobby Lobby and used E-6000 to secure magnets to the back of each snowflake.
Using my Cricut, I added vinyl numbers to the snowflakes so we could count down the days until Christmas! You could also use paper numbers.
Using chipboard letters, I made the "days" sign, mounted on more scrapbook paper. I also distressed the edges.
I just glued 2 magnet tape squares onto the tree so that the snowflake numbers would stick. Then I topped the tree with a big red ribbon bow.
I glued these fun epoxy buttons all over the front and back of the tree as ornaments. (This is the back side.)
I found this cute star box and spray painted it red. Then I mod-podged paper and ribbon around the box's edges. Now I can use this box to hold the extra snowflake numbers! I am excited to start counting down the days until Christmas! Here are a few close-ups:


So cute! I love it :-) Thanks for sharing yet another fabulous idea!
ReplyDeleteStill loving this! SUCH a cute idea! :)
ReplyDeleteWHAT?! Alison this is sOoOoO Cute! I want to make one of these...TODAY! You always have the ctest ideas:) You are so talented! I love christmas too its the most wonderful time of the year:)
ReplyDeleteWhat a cute countdown! I love it! Thanks for sharing your craftiness with us!
ReplyDeleteOoooh Alison this is so cute!! I love the snowflake letters!
ReplyDeleteThis is precious - I linked in the MPR Facebook group!! xo
ReplyDeleteoh I love this!! It is so pretty!
ReplyDeleteThis is a beautiful way to count it down <3
ReplyDeletethanks for sharing this!
xo
Gaye
Alison, you make the cutest stuff. Seriously. Can't we live by each other and have craft parties? This is darling. Love love it.
ReplyDeleteSo cute! I love your ideas - can't wait to see more countdown calendars!
ReplyDeleteWhat a cute and festive tree Alison!
ReplyDeletexoxx
Jen
This is off the subject....BUT do you have any cute ideas for neighbor gifts for Christmas? Thank you
ReplyDeleteThis is darling! Love it...
ReplyDeleteVery cute! You did such a great job! Would love for you to visit me and link up to Made with Love Monday at Sew Chatty! http://sewchatty.blogspot.com
ReplyDeleteYou've put in so much effort and it turned out fantastic !
ReplyDeleteI'm loving this! So cute! We used to have a countdown to Christmas when we were kids. Love the idea!
ReplyDelete