
Well, after a 7-hour baking marathon that lasted till the wee hours of the morning, now I can say we survived the weekend! I guess by telling you THAT, I may have slightly gave away yesterday's story.
The Baker's Dozen is a "sweet" Christmas tale that we really enjoyed! Naturally, we spent all evening baking. Little Man LOVED helping to cut out the sugar cookies. He was an expert decorator, but of course, test-tasting cookies was his favorite part! We made and decorated 7 dozen cookies, 1 tray of peppermint bark, and a cake!

Today's story is an ABC Book. The illustrations by Mary Engelbreit are exquisite! To celebrate the "O is for ornament" page, I am sharing another--yes another!--ornament tutorial. But I have a purpose for saving this one for last. If you're like me, you might just be in gift delivery mode. (I am so impressed by those of you who are already done!) Anyway, this ornament makes the perfect embellishment to any gift delivery! Plus, this is one patchwork you don't have to sew a single stitch!
So in case you missed my tutorial at The Creation Corner...

Growing up, it seemed like we were always delivering Christmas gifts. Piano teachers, soccer coaches, school teachers, friends, neighbors, you name it! The list of gift recipients was constantly growing.
We were a frugal family... okay, we were cheap! But thank goodness for a crafty mama. She put us to work creating gifts for our own school teachers. I must have been quite young when my Mom first taught me to make these Christmas patchwork ornaments. Each year, we presented our school teachers with our own lil' handmade Christmas gifts... yes, these very patchwork ornaments!
This year, I revisited the idea of patchwork ornaments and experimented with some new twists to this classic idea. Come along with me, and I'll show you how to create a gorgeous gift for those last-minute people popping up on your own gift-giving lists:
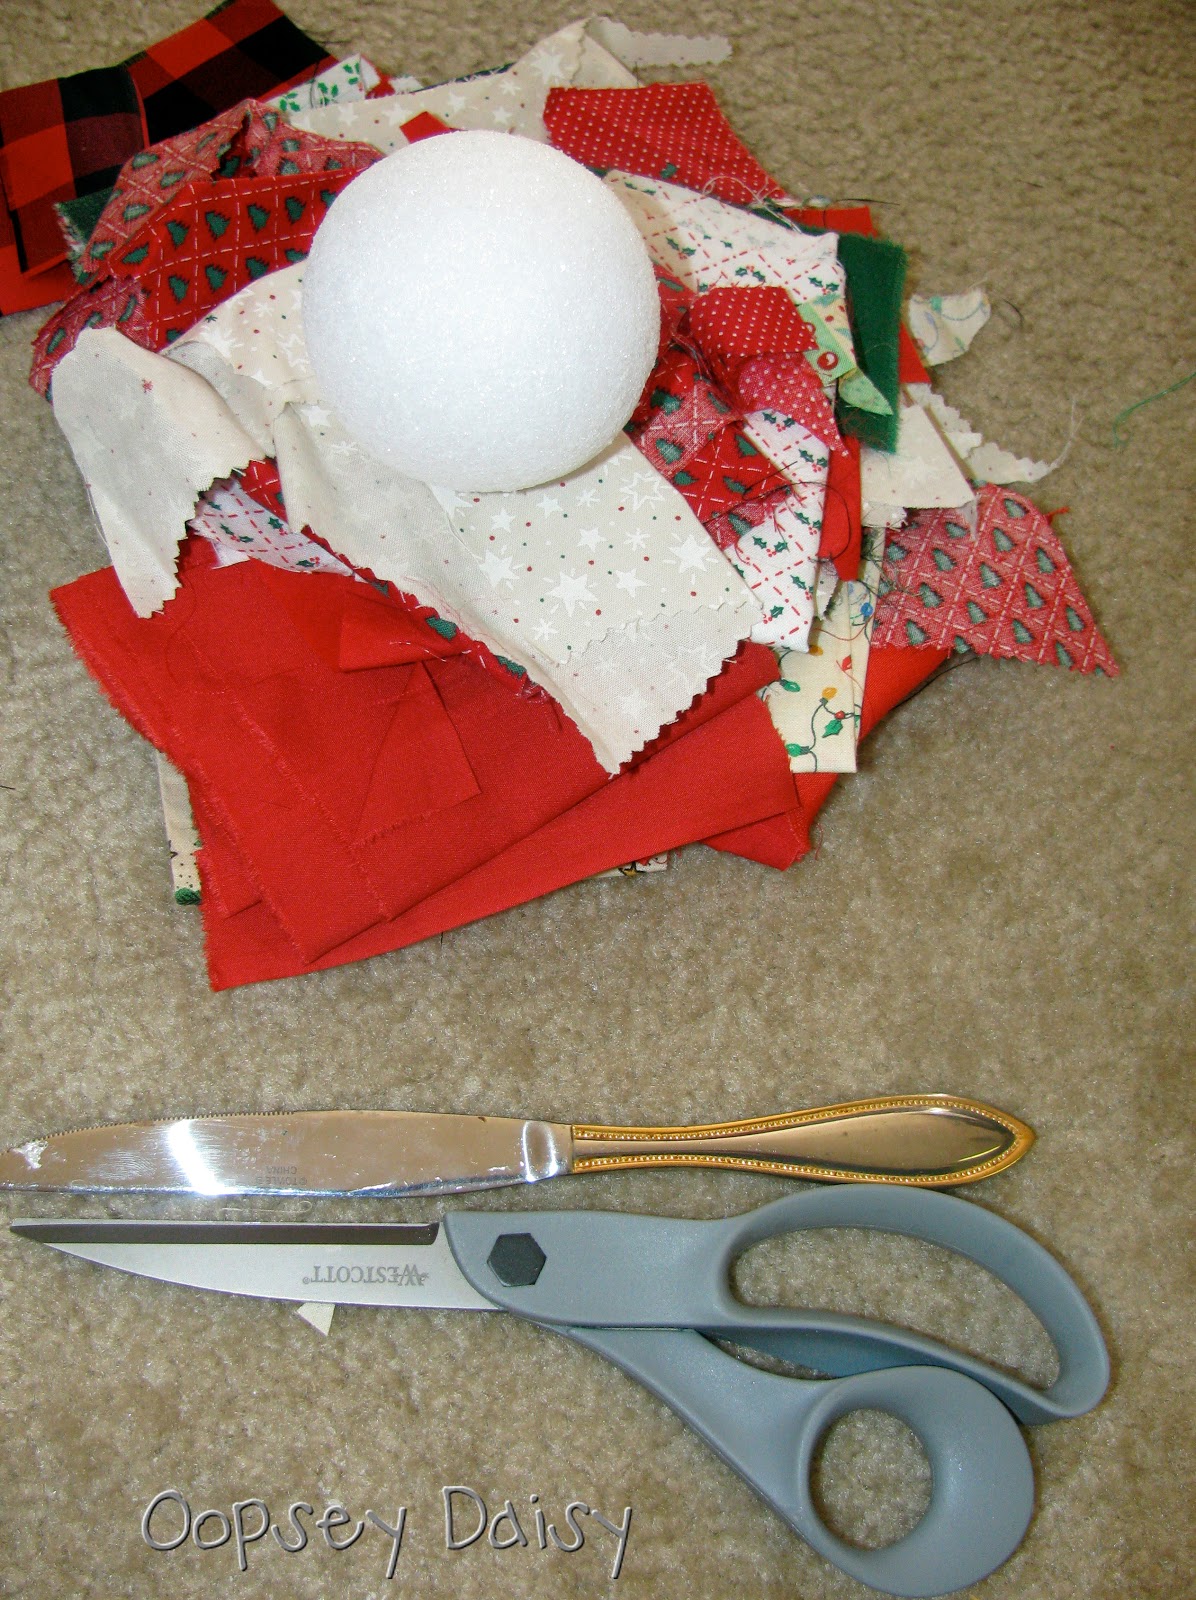
For this project, you will need:
* Styrofoam ball
* Lots of Christmas fabric scraps (Ask your friends and family if they have some to spare!)
* Butter knife
* Scissors
* Ribbon

Cut several pieces of different shapes and sizes from your scraps. There is no exact science here. Just start cutting, and add different shapes and sizes! Begin by taking your first fabric scrap and placing it on the styrofoam ball. Use a butter knife to push the edges of the fabric into the styrofoam ball. It should be nice and snug!

Continue with your next scrap, pushing it into the same groove as the previous piece. This creates the "patchwork" pattern.

The trickiest part is that last blank spot on the ornament! The styrofoam can give out if stressed too much. Be gentle with that last piece in the patchwork puzzle!

Now just add a ribbon loop to hang your ornament by securing it with hot glue. Simple and sweet!

So which one is YOUR favorite? I still love the original, but I must say I adore that lace!
By the way, if you get too attached to these lovelies and don't feel like giving them away, they make a splendid centerpiece! Last year, I created a whole basket of patchwork ornaments (without the ribbon loops) and threw them on my coffee table.

There is something about these patchwork ornaments that is just so homey!
Alright--this is officially my LAST ornament tutorial. Can you believe it?!
Enjoy your week of CHRISTMAS!

Too cute! I somehow missed this tutorial. Such a neat trick and a fun outcome. Congrats on the marathon of baking!! I just started some of mine today to spread it out over the next week. Lots ahead of me including your peanut blossom cookies! :)
ReplyDeleteI love this! Although I would like to learn how to sew, I haven't quite conquered that world yet so this is a great alternative. Cute!
ReplyDeleteVery cute! Will have to try to make these with my sons. thanks for sharing about the books, too. Will have to look for those at our library and bookstores.
ReplyDeleteWhat a neat advent day to read, bake, and make those ornaments...fun!
Colleen:)
Those are so sweet=) Thank you for the book, too! Saving for my preschoolers next year! How fun=D We made ornaments like yours for Christmas, only we poked squares in and they were fluffy balls. Love the crazy quilt designs! Merry Christmas!
ReplyDeleteoh fun! As a kid we made these with the egg shapes at Easter, never thought of doing Christmas ornaments!
ReplyDelete